Difference between revisions of "High Mountain"
Jump to navigation
Jump to search
Blueturbo47 (talk | contribs) (Town Assets, no images) |
m (Updated module icons to use Template:Module.) |
||
| (One intermediate revision by one other user not shown) | |||
| Line 17: | Line 17: | ||
==Environmental Effects== | ==Environmental Effects== | ||
This area has no environmental effects. | This area has no environmental effects. | ||
| + | |||
| + | ==Challenges== | ||
| + | {{See also|Challenge Mode}} | ||
| + | {| class="wikitable" | ||
| + | !Name!!Enemies!!Goals!!Rules!!Rewards | ||
| + | |- | ||
| + | !Level #1 | ||
| + | | style="text-align: center;" |{{Element|Air}} | ||
| + | |Reach wave 250 | ||
| + | |{{collapsible|width=400|Rules| | ||
| + | * Max. 10 modules in total | ||
| + | * Modules have to be maxed T1 or above | ||
| + | * Modules will be set to maxed T1 | ||
| + | * Enemies reflect 100% of non-air damage | ||
| + | }} | ||
| + | | +1% air resistance per completed challenge | ||
| + | |} | ||
| + | |||
==Modules== | ==Modules== | ||
| Line 24: | Line 42: | ||
!Type!!Name!!Unlock Condition | !Type!!Name!!Unlock Condition | ||
|- | |- | ||
| − | | | + | |<center>{{Module|Offensive|size=30px}}</center>||'''Divine Blessing'''||Random 0.15% |
|- | |- | ||
| − | | | + | |<center>{{Module|Offensive|size=30px}}</center>||'''Light Splash'''||Random 0.9% |
|- | |- | ||
| − | | | + | |<center>{{Module|Offensive|size=30px}}</center>||'''Fire Splash'''||Random 0.9% |
|- | |- | ||
| − | | | + | |<center>{{Module|Offensive|size=30px}}</center>||'''Electricity Splash'''||Random 0.9% |
|- | |- | ||
| − | | | + | |<center>{{Module|Offensive|size=30px}}</center>||'''Air Splash'''||Random 2% |
|- | |- | ||
| − | | | + | |<center>{{Module|Defensive|size=30px}}</center>||'''Air Shell'''||Random 1% |
|- | |- | ||
| − | | | + | |<center>{{Module|Defensive|size=30px}}</center>||'''Air Barrier'''||Random 1% |
|- | |- | ||
| − | | | + | |<center>{{Module|Defensive|size=30px}}</center>||'''Bulletproof'''||Random 0.9% |
|- | |- | ||
| − | | | + | |<center>{{Module|Defensive|size=30px}}</center>||'''Shield Recharger'''||Random 0.5% |
|} | |} | ||
Latest revision as of 01:10, 24 August 2023
| High Mountain | |
|---|---|

| |
| Lanes | 5 |
| Enemies | |
| Difficulties | |
| Easy | 1.74 M% (1.74e6%) |
| Medium | 3.14 M% (3.14e6%) |
| Hard | 18.2 M% (1.82e7%) |
| Insane | 391 M% (3.91e8%) |
| Nightmare | 235 B% (2.35e11%) |
| Impossible | 1.61 Qi% (1.61e18%) |
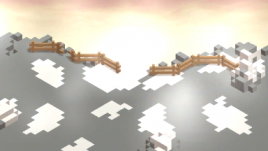
High Mountain is the sixth region in the game, unlocked after completing wave 100 on Volcano.
Completing wave 100 in this region unlocks the Jungle region.
Environmental Effects
This area has no environmental effects.
Challenges
- See also: Challenge Mode
Modules
- See also: Modules
| Type | Name | Unlock Condition |
|---|---|---|
| Divine Blessing | Random 0.15% | |
| Light Splash | Random 0.9% | |
| Fire Splash | Random 0.9% | |
| Electricity Splash | Random 0.9% | |
| Air Splash | Random 2% | |
| Air Shell | Random 1% | |
| Air Barrier | Random 1% | |
| Bulletproof | Random 0.9% | |
| Shield Recharger | Random 0.5% |
Town Assets
The following town assets are unlocked after completing wave 100:
- Fence
- Fence Gate / Broken Fence
- Snowy Rock