Laboratory
| Laboratory | |
|---|---|
| |
| Max. Tier | 6 |
| Conversion rate | 400:1 |
| Color theme | Green |
The laboratory is a building where you perform various experiments in order to unlock modules.
Experiments unlock modules accordingly to it's respective element.
Contents
Experiments
There are 12 different experiments in the laboratory.
The experiments function as small incremental games, where the reward for progressing in them are modules.
In the future, experiments will feature their own prestige systems.
Neutral
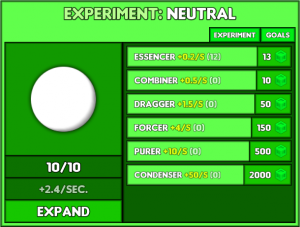
The goal of the Neutral Experiment is to expand a sphere.
Upgrades increases how fast the sphere grows.
Expanding converts current growth into maximum growth, which resets the sphere back to size 0.
Fire
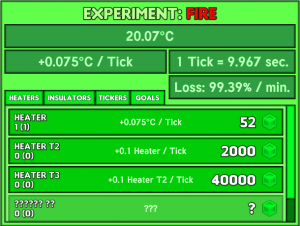
The goal of the Fire Experiment is to raise the temperature gauge.
Heaters increase temperature per tick.
Tickers reduce the time per tick.
Insulators reduce the percentage of temperature lost per minute.
Upgrades of a higher tier produce upgrades of their previous tier.
Electricity
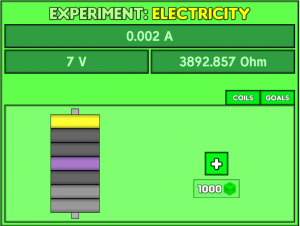
The goal of the Electricity Experiment is to raise the amperage.
Each coil (battery) starts with 1 wrap (cell), with wraps capping at 20 per coil and coils capping at 5.
Each wrap adds 1V on the coil it's on.
The total voltage is calculated with the product of voltages of all coils.
Each wrap's material can be upgraded to reduce it's resistance.
The resistance of a coil is the average of the resistances of all wraps in that coil.
Total resistance is the average of the resistances of all coils
Amperage is calculated with Voltage(V) / Resistance(Ohm)
Water
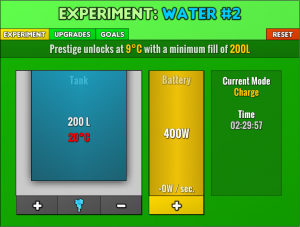
The goal of the Water Experiment is to pump up to or more of a certain amount of water and then cool down said amount of water to a certain temperature..
The pump produces water. Warning: Water can't be drained as of build "open alpha 0.1.8", If you pump too much water you may not be able to complete the experiment in a reasonable amount of time.
The cooler lowers the temperature of the water.
The battery increases the power output of both the pump and the cooler, increasing their efficiency. The battery keeps on building energy over time, but also resets the energy pool when upgraded, so upgrading the battery might make things worse.
Nature
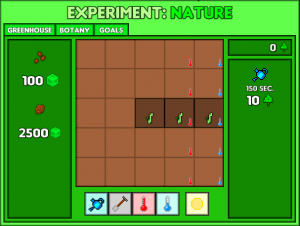
The goal of the nature experiment is to grow different varieties of plants.
Plant seeds in the grid, water and then wait for plants to grow. Click the plants with an empty mouse to harvest when ready, and use the shovel to delete seeds/plants.
Adding or removing temperature, along with choosing day or night, can affect the flower mutation.
Experiment with these options to find new species.
Harvesting plants also rewards points which can be spent to increase the time which watering lasts.
Earth
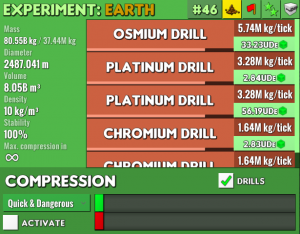
The goal of the Earth Experiment is to get a certain amount of density.
Drills dig up earth, upgrades collect earth faster. Additional drills can be purchased. Upgrades and drills cost increase exponentially.
Compression reduces volume/diameter and raises density. Eventually, compression reduces stability, which reduces mass and will eventually reduce density. Compression speed doesn't seem to effect stability decrease, but compression mode does reduce stability way earlier for faster density speed.
Compression modes:
- Volantre (10%): 10% compression level, multiplies density by 1.1
- Strawman (35%): 35% compression level, multiplies density by 1.35
- HYUP (80%): 80% compression level, multiplies density by 1.8
Turning off compression reduces density, and stability slowly rises at a constant pace regardless of drill tiers/amount.
Air
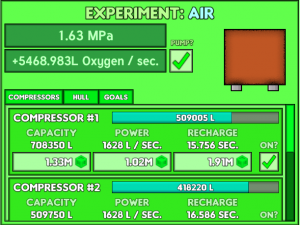
The goal of the Air Experiment is to build up pressure inside a chamber
Compressors
Take in oxygen and force it into the chamber. You can buy multiple compressors. The upgrades for compressors are:
- Capacity: How much oxygen a compressor can hold.
- Power: How fast the compressor pushes oxygen into the tank, aka how quickly the compressor bar goes from 100% to 0%
- Recharge: How fast the compressor fills up with oxygen, as in how fast the compressor bar goes from 0% to 100%
Hulls
Increase oxygen retention rate, as in makes sure oxygen doesn't leak out.
Darkness
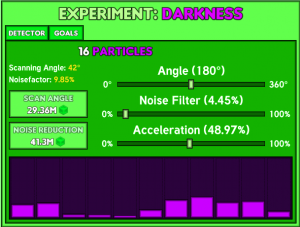
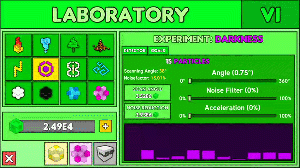
The goal of the Darkness Experiment is to find particles in the dark. There is a bug where the graph shows up empty. Simply exit the laboratory, enter a quick tower run to change scenes and come back. If that does not fix darkness experiment, try changing the graphics settings.
There are three sliders that help locate and find a particle:
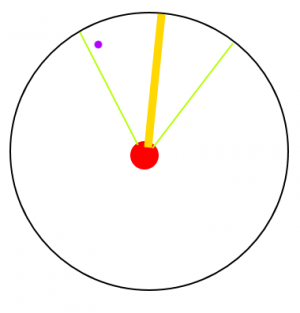
- Angle: Rotates direction, to help directly face a particle, or get a particle within the scanning angle range. When a particle is inside the scanning angle range, the graph starts to form a smooth wave that moves from right of the graph to the left of the graph. Max height of the smooth wave is achieved when facing directly at the particle, with a smaller smooth wave the farther the particle is from exact direction.
- Noise filter: Lowers how impactful noise is on the graph, as noise is just random readings on the graph that makes finding a wave difficult. 100% noise filter lowers impact to 0, resulting in an empty and useless graph.
- Acceleration: Apparently is speed instead of acceleration. Changes how fast travel speed is in a direction. When getting closer to a particle, the graph smooth wave gets bigger, and a button starts to appear at the top right showing how close the particle is. Once the particle is in reach, clicking the button collects the particle. Neglecting to capture the particle results in moving past the particle and getting out of range.
There are two upgrades to help find a particle:
- Scan angle: Increases the search angle for a particle, allowing for more accuracy with using the angle slider.
- Noise reduction: Reduces base noise, not affecting the smooth wave at all.
Light
The goal of the Light Experiment is to create as much light as possible.
Chamber
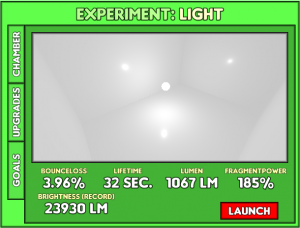
Launching a light particle creates light when hitting a wall, for hitting a wall fragments the particle leaving part of the particle on the wall as a light source, which also reduces how many lumens the particle has.
The statistics of the chamber are:
- Bounceloss: How many lumens are lost from the particle when hitting a wall.
- Lifetime: Amount of time that the particle is active.
- Lumen: How bright the particle is.
- Fragmentpower: How bright the fragments are compared to the particle at the time of impact.
Upgrades
Upgrades can help gather more light. The upgrades are:
- Bounceloss: Reduces lumen loss on bounce.
- Lifetime: Longer particle lifetime.
- Lumen: Increases brightness of the particle.
- Fragmentpower: Increases the percentage of fragment light compared to the particle (Eventually gets to the point that fragments give more light than the particle itself).
Universal
The goal of the Universal Experiment is to increase the gravity of a ball.
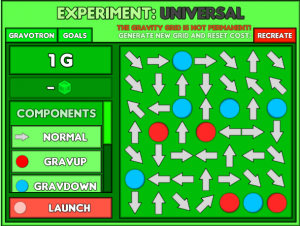
The gravity grid has many icons that interact with the ball, and is able to be altered, with increasing costs for each alteration. Recreating the board resets the alteration cost and creates a new gravity grid. Click the launch button at the bottom left spawns a ball at the bottom left corner of the gravity grid.
Components: Icons that have different effects on the ball. Click one to activate, then clicking icons on the gravity board changes the icons to the currently selected component. Here are the components:
- Normal: Sends the ball in the direction pointed. Disappears after one use.
- Gravup: Increases gravity of the ball.
- Gravdown: Decreases gravity of the ball.
- Infinite(#): Sends the ball in the direction pointed. Stays forever. # = Amount of times you can play this component on the gravity grid.
- 3 times(#): Sends the ball in the direction pointed. Lasts for 3 uses. # = Amount of times you can play this component on the gravity grid.
Actions: Ability to rotate icons on the gravity grid. Select one of the rotations, then click an icon to rotate the icon. Does not work on certain components, such as gravup. Works on these components:
- Normal
- Infinite
- 3 times
Gem
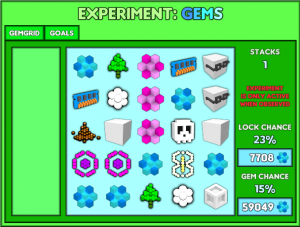
The goal of the Gem Experiment is to fill the board with normal gems, EXOTIC GEMS DO NOT COUNT.
Clicking a tile rolls the tiles around the central tile in a + formation (Max is 5 tiles) into random icons. Roll time varies, from 1 second to 15 seconds.
Upgrades:
- Lock chance: Chance to not re-roll a tile if the icon is a gem. Does not work on the tile being clicked, as in clicking a gem tile always re-rolls the tile.
- Gem chance: Chance for a tile to end up being a gem.
1 stack = 9 gem boards.
Exotic
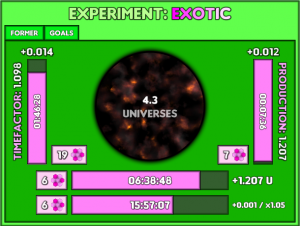
The goal of the exotic experiment is to create fabrics of reality, which require ∞universes.
Stat Modifiers
- Time factor: (Left) Reduces all modifier bar times by the time factor (Time / TimeFactor). Bar fills increases time factor by +0.01 (May increase more if the boost modifier has filled one or more bars).
- Production: (Right) Increases how many universes the universe modifier produces. Bar fills increase production.
- Universe: (Top middle) Bar fills create universes.
- Boost: (Bottom middle) Bar fills boost time factor bar fills additively by +0.001, and boosts production bar fills multiplicatively by *1.05
Upgrades
Each modifier bar can be upgraded to reduce the base time for the bar to fill up. Each upgrade reduces base time by 20%, or rather multiplies the base time by 0.8. These are the stats for the modifier times:
- Time factor: Base time [60 hours] Cost = (level * 3) + 1
- Production: Base time [25 hours] Cost = level
- Universe: Base time [100 hours] Cost = level + 1
- Boost: Base time [50 hours] Cost = (level * 5) + 1
Building tiers
Each building tier constructed unlocks new experiments.
| Laboratory | Experiments |
|---|---|
| Tier 1 | Neutral, Fire |
| Tier 2 | Nature, Electricity |
| Tier 3 | Earth, Light |
| Tier 4 | Water, Air |
| Tier 5 | Darkness, Universal |
| Tier 6 | Gem, Exotic |
Skills
None yet.
